I still remember the sinking feeling I had on my sister’s wedding day. I was the unofficial photographer, armed with a DSLR I had barely learned to use, and halfway through the ceremony my camera refused to focus. The autofocus motor whirred endlessly, hunting back and forth, while the moment I wanted to capture slipped away. I panicked, switched to manual focus, and missed the shot entirely. That evening, I spent three hours researching what went wrong, and I discovered that the fix was simpler than I feared. The lens contacts were dirty, and a gentle cleaning with a microfiber cloth solved it in under two minutes.

If you have ever faced a camera that suddenly stopped working, produced blurry images, or displayed cryptic error codes, you are in the right place. Camera problems are frustrating, but most of them are fixable without professional help. This guide will walk you through the most common camera issues across smartphones, DSLRs, mirrorless cameras, and webcams, with practical fixes you can try right now.
Why Cameras Fail: Understanding the Root Causes
Before diving into fixes, it helps to understand why cameras malfunction in the first place. Problems generally fall into three categories: physical issues like dirty lenses or damaged hardware, software glitches like outdated drivers or corrupted apps, and user errors like incorrect settings or incompatible accessories.

Physical problems are the most common. A smudged lens, dust on the sensor, moisture inside the camera body, or a loose connection can all prevent a camera from functioning properly. Software issues often appear after operating system updates, app crashes, or when multiple programs try to access the camera simultaneously. User errors, while embarrassing, are easily corrected once you know what to look for.
The good news is that the majority of camera problems can be diagnosed and resolved with a systematic approach. You do not need to be a technician. You just need patience and a willingness to work through the possibilities methodically.
Blurry Photos: The Most Common Complaint
Blurry images are the number one frustration for both smartphone and dedicated camera users. The causes range from trivial to serious, so start with the simplest fixes first.
Clean your lens. This sounds obvious, but you would be amazed how many blurry photos are caused by fingerprints, dust, or grease on the lens surface. Use a clean microfiber cloth and gently wipe in a circular motion from the center outward. For stubborn smudges, breathe lightly on the lens to create moisture, then wipe again. Avoid using your shirt, paper towels, or tissues, as these can scratch the glass.
Check for lens damage. Micro-scratches on the lens or protective glass can scatter light and reduce sharpness. Hold the lens at an angle under a light source and look for visible scratches or cracks. If the front element is damaged, replacement may be necessary for DSLRs and mirrorless cameras. For smartphones, a cracked lens cover usually requires professional repair.
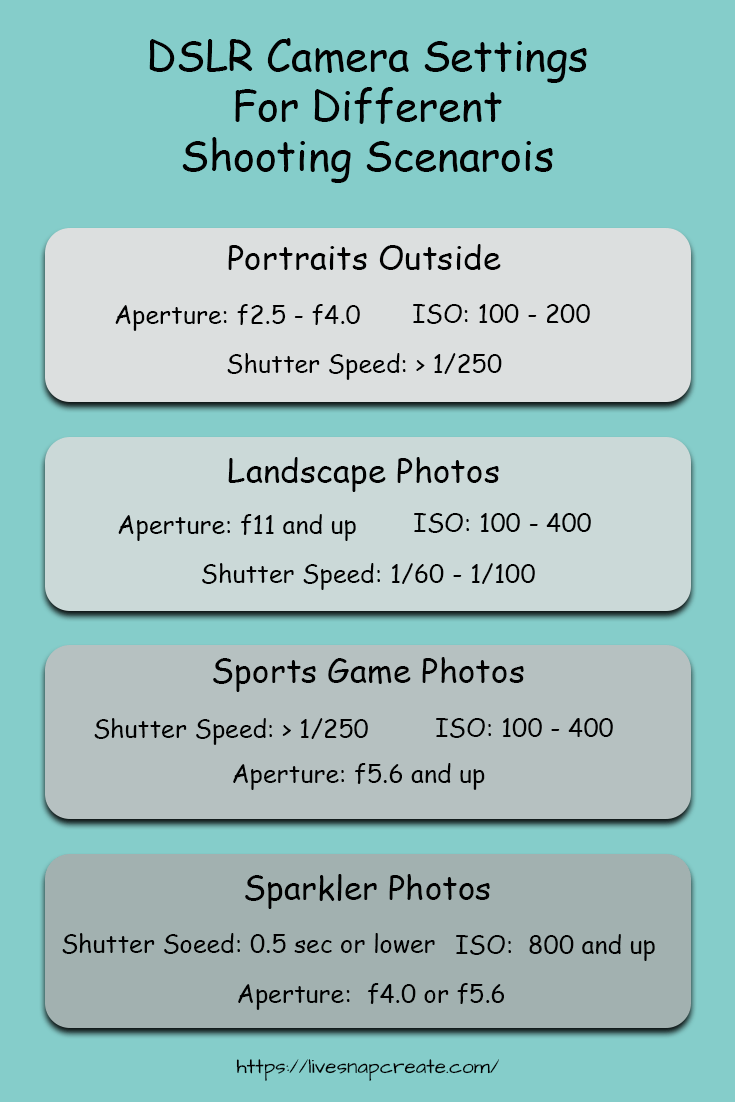
Stabilize your shots. Camera shake is a leading cause of blur, especially in low light. Use both hands when shooting, tuck your elbows against your body, and exhale gently as you press the shutter. For smartphones, enable any built-in stabilization features. For dedicated cameras, consider a tripod or monopod for slower shutter speeds. A good rule of thumb is that your shutter speed should be at least the reciprocal of your focal length. If you are shooting at 50mm, keep your shutter speed at 1/50th of a second or faster.
Verify your focus settings. If your camera is set to manual focus and you forgot to adjust the ring, every shot will be blurry. Switch back to autofocus and tap the screen on your subject to ensure the camera locks on. For DSLRs, check that your lens switch is set to AF, not MF. Some lenses also have focus limiters that restrict the focusing range, which can cause hunting if your subject is outside the selected range.
Autofocus Problems: When Your Camera Cannot Lock On
Autofocus failure is one of the most panic-inducing issues because it happens at the worst possible moments. If your camera keeps searching for focus without locking on, try these steps.
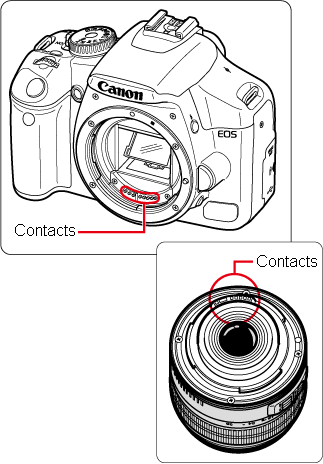
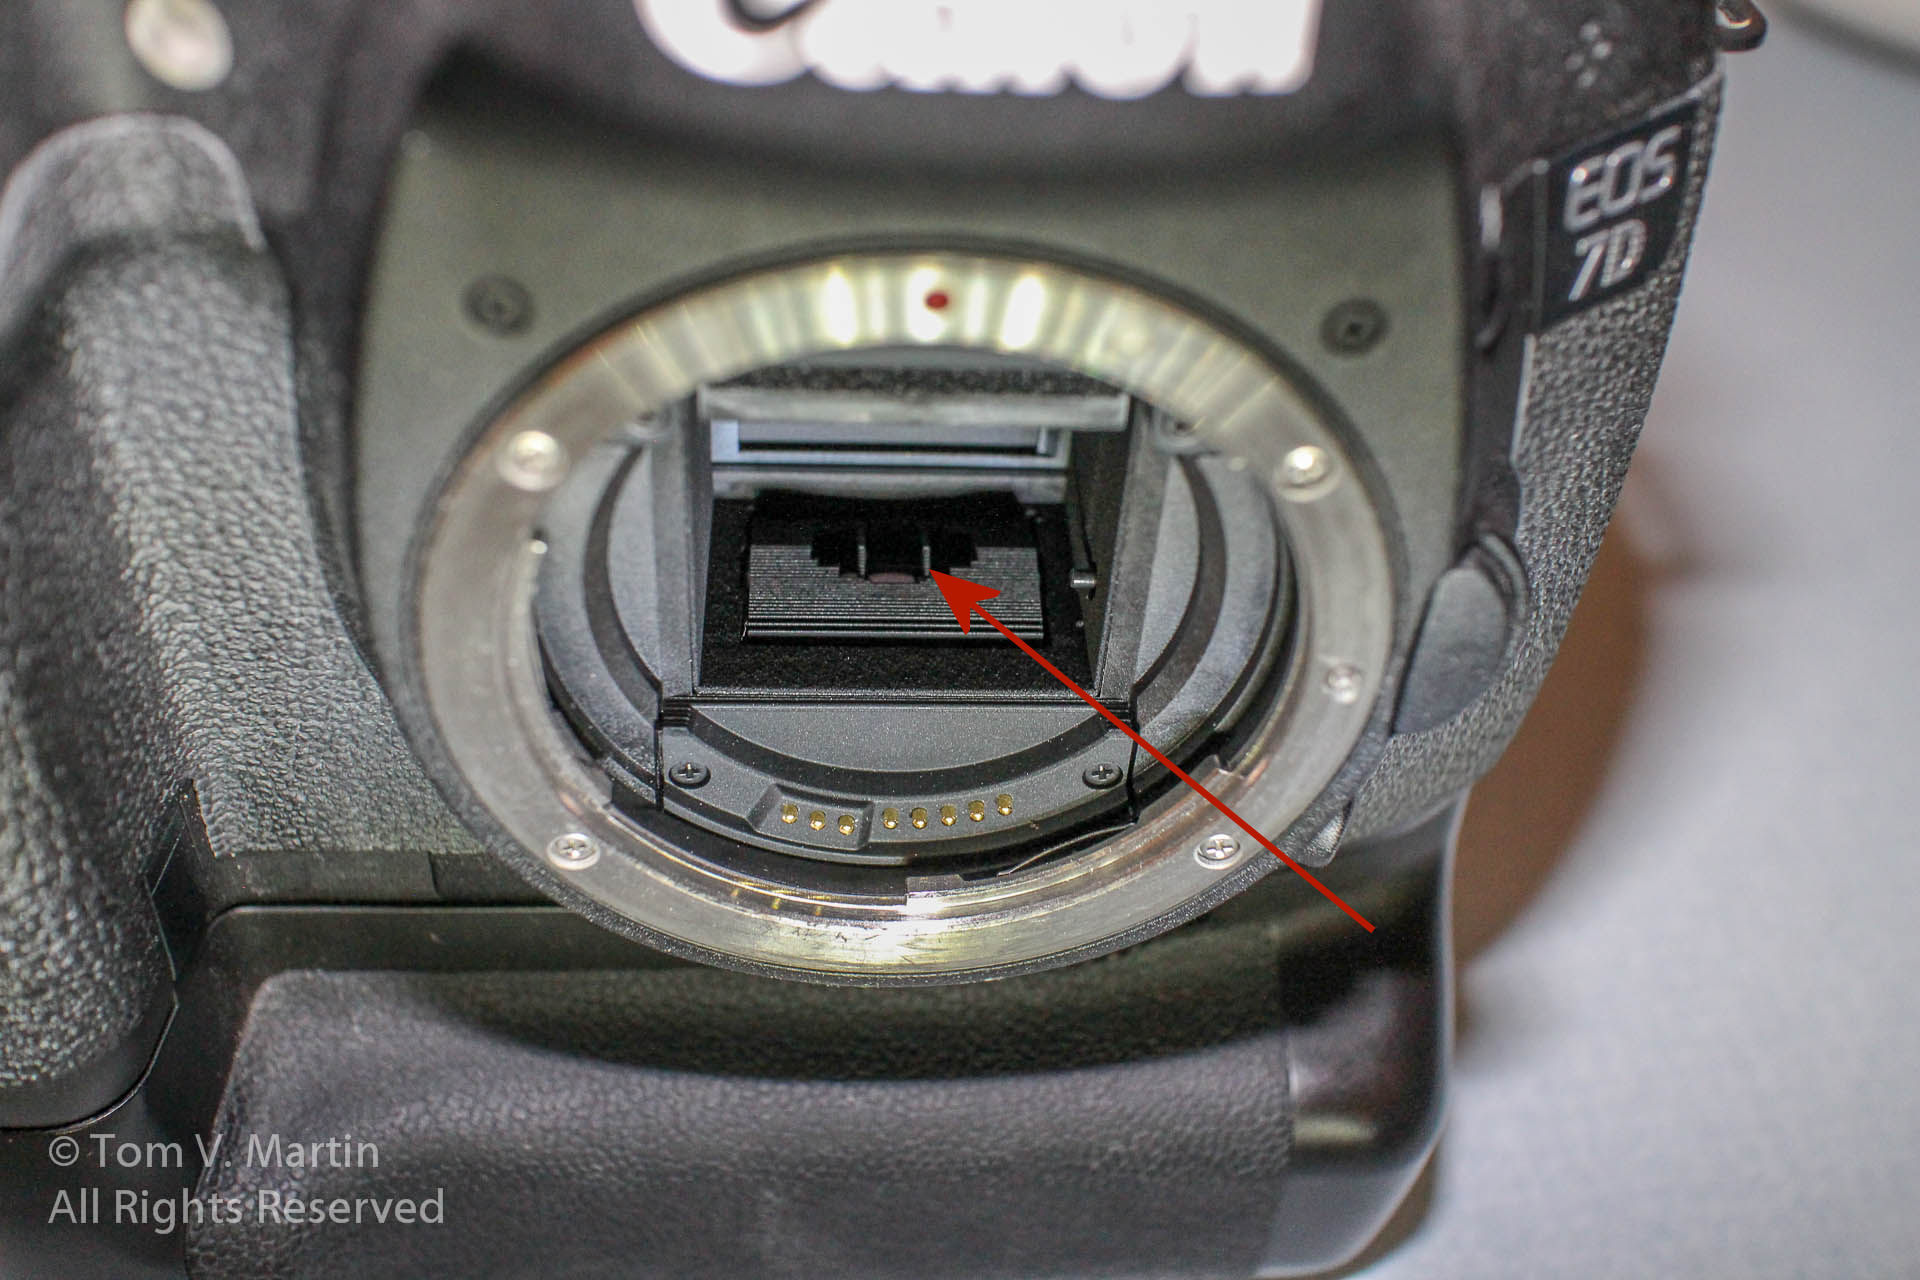
Clean the lens contacts. The metal contacts on both the camera body and the lens transmit data that controls autofocus. Over time, oxidation or grime can interfere with this communication. Remove the lens, inspect the gold-colored contacts, and gently clean them with a dry microfiber cloth or a cotton swab. Reattach the lens firmly until you hear the click. This simple step resolves a surprising number of autofocus issues.
Check your focus mode. Most cameras offer multiple autofocus modes. Single-point AF is best for stationary subjects. Continuous or tracking AF is designed for moving subjects. If you are using the wrong mode for your scene, the camera may struggle to lock on. Switch to single-point AF for portraits and landscapes, and use continuous AF for sports or wildlife.
Ensure adequate light and contrast. Autofocus systems need contrast to detect edges. Pointing your camera at a blank wall, a clear sky, or a very dark scene will confuse the system. Try focusing on a high-contrast edge within the frame, then recompose your shot. In low light, use the camera’s focus assist lamp or shine a flashlight temporarily on your subject to help the system lock on.
Test with a different lens. If you have a spare lens, attach it and test the autofocus. If the second lens works fine, the problem is likely with the first lens, not the camera body. This narrows down whether you need a lens repair or a body repair.
Smartphone Camera Issues: Black Screens and App Crashes
Smartphone cameras are incredibly convenient, but they are also prone to software-related problems that can render them useless.
Restart your phone. This is the smartphone equivalent of turning it off and on again, and it works more often than you might expect. A restart clears temporary memory, closes background processes, and refreshes the camera app’s connection to the hardware.
Force close and reopen the camera app. On iPhones, swipe up from the bottom and swipe the camera app away. On Android, go to Settings, then Apps, find your camera app, and tap Force Stop. Then reopen the camera app. This clears any corrupted state that may be causing the black screen.
Clear the camera app cache. On Android devices, accumulated cache data can cause the camera app to misbehave. Go to Settings, Apps, Camera, Storage, and tap Clear Cache. This will not delete your photos. It simply removes temporary files that may be causing conflicts.
Check for software updates. Camera problems often appear after operating system updates that introduce bugs. Conversely, manufacturers frequently release patches specifically to fix camera issues. Make sure your phone’s operating system and camera app are fully updated.
Free up storage space. A nearly full phone can prevent the camera app from functioning because it has nowhere to save new photos. Check your storage settings and delete old screenshots, downloads, and duplicate photos. Aim to keep at least 10 percent of your total storage free.
Webcam and Laptop Camera Errors
Laptop cameras have become essential for remote work and video calls, yet they are notoriously finicky. If your webcam shows a black screen or an error code, here is how to troubleshoot it.
Check privacy settings. After Windows updates, camera permissions are sometimes reset. Go to Settings, Privacy and Security, Camera, and ensure that Camera Access is turned on. Also verify that the specific app you are using, like Zoom or Teams, has permission to access the camera.
Look for a physical switch or key combination. Some laptops have a physical shutter switch or a keyboard shortcut that disables the camera. Check along the bezel of your screen and your function keys for a camera icon. If you find one, make sure it is in the on position.
Update or reinstall drivers. Open Device Manager, expand the Cameras section, right-click your camera, and select Update Driver. If that does not work, uninstall the device, restart your computer, and let Windows reinstall the driver automatically. This resolves many driver corruption issues.

Close conflicting apps. Only one application can use your camera at a time. If Zoom is running in the background, Teams may not be able to access the camera. Check your taskbar and system tray for any apps that might be holding the camera open, and close them.
Error Codes and What They Mean
Error codes can seem intimidating, but they are actually helpful diagnostic tools. Here are the most common ones and what they indicate.
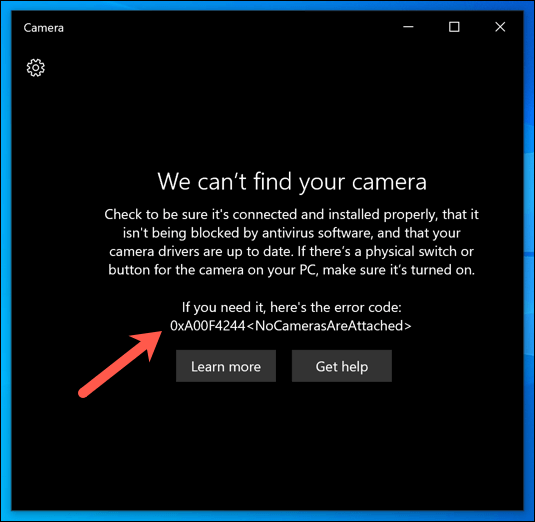
Error 0xA00F4244 on Windows means the system cannot detect your camera. This usually points to a driver issue, a disabled device in Device Manager, or a physical connection problem. Check that the camera is enabled in Device Manager, update your drivers, and restart your computer.
Error 0xA00F4292 indicates that the camera access is restricted by policy or another application is blocking it. Check your antivirus software, as some security programs block camera access by default. Also verify that no other app is currently using the camera.
Error 0x800705AA means insufficient system resources. Close unnecessary applications to free up RAM, restart your computer, and try again. If the error persists, update your camera driver.
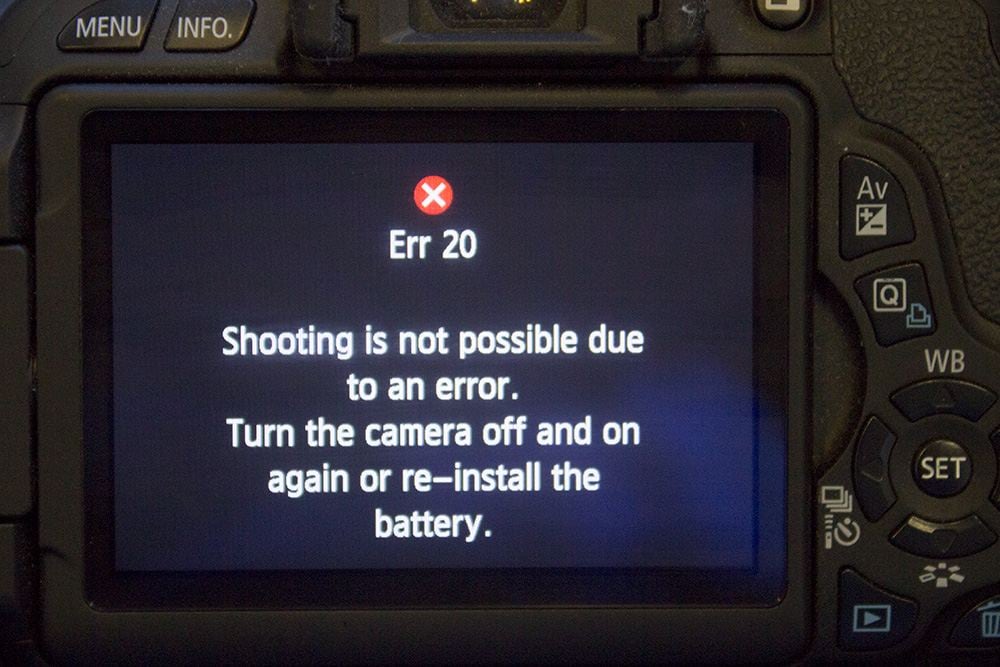
Error 20 on Canon cameras typically indicates a mechanical issue with the shutter or mirror assembly. Turn the camera off, remove the battery, wait a minute, reinsert the battery, and power back on. If the error repeats, professional service is likely needed.
Flash and Lighting Problems
A non-working flash can ruin photos in low-light situations. Before assuming the flash is broken, check a few simple things.
Verify the flash is enabled. In many camera apps, the flash defaults to auto or off. Check the lightning bolt icon and set it to on if you need guaranteed flash illumination.
Check for overheating. If your camera or phone feels hot, the flash may be temporarily disabled as a safety measure. Let the device cool down before trying again.
Test the flash in flashlight mode. On smartphones, open the flashlight app. If the LED does not light up, the bulb itself may be damaged and needs replacement.
Sensor Dust and Image Spots
If you notice dark spots in the same location across multiple photos, especially when shooting against a bright sky or white wall, you likely have dust on your camera sensor.
Confirm the spots are on the sensor, not the lens. Take a photo of a plain white surface at a small aperture like f/16 or f/22. If the spots remain in the same place when you zoom in, they are on the sensor. If they move when you change lenses, they are on the lens.
Use a blower first. With the camera facing downward, use a hand-powered air blower to gently dislodge dust. Never use compressed air cans, as they can spray propellant onto the sensor. Many times, this is all you need.
Consider a sensor cleaning kit. If the blower does not work, specialized sensor cleaning swabs and solution are available. However, this requires care and confidence. If you are uncomfortable cleaning your own sensor, a professional cleaning is inexpensive and eliminates the risk of damage.
Moisture and Condensation Inside the Lens
Moving between temperature extremes can cause condensation inside your camera or lens. This appears as foggy or hazy images and can lead to mold growth if not addressed.
Let the camera acclimate gradually. When moving from a cold environment to a warm one, seal your camera in a zippered bag with silica gel packets and let it warm up slowly. This prevents moisture from condensing on the cold glass surfaces.
Dry it out naturally. If condensation has already formed, remove the battery and memory card, open all compartments, and place the camera in a dry, warm area with good airflow. Do not use a hair dryer, as the heat can damage internal components.
When to Seek Professional Help
Some camera problems are beyond DIY repair. Know when to stop troubleshooting and call a professional.
-
The camera has been dropped or exposed to water and no longer powers on.
-
The lens makes grinding noises or will not extend or retract.
-
Error codes persist after all software fixes have been attempted.
-
The sensor has visible scratches or damage.
-
Internal moisture will not clear after several days of drying.
Professional repair costs vary widely. A simple cleaning might cost thirty to fifty dollars. A sensor replacement or motherboard repair can run into the hundreds. Weigh the repair cost against the value of your equipment before committing.
Preventing Future Camera Problems
The best fix is the one you never have to make. A few simple habits can keep your camera functioning reliably for years.
-
Always use a lens cap or cover when the camera is not in use.
-
Store cameras in a dry bag with silica gel in humid climates.
-
Change lenses quickly in dusty environments, with the camera facing down.
-
Keep your software and firmware updated.
-
Use quality memory cards from reputable brands to avoid corruption.
-
Handle your equipment with clean hands to reduce smudges and grime.
Frequently Asked Questions
Why are all my photos coming out blurry?
The most common causes are a dirty lens, camera shake, incorrect focus settings, or a damaged optical stabilization system. Start by cleaning the lens and stabilizing your hands, then check your focus mode.
My camera app shows a black screen. What should I do?
Restart your phone first. If that does not work, force close the camera app, clear its cache, and check for software updates. Also verify that another app is not already using the camera.
How do I fix autofocus that keeps hunting?
Clean the lens contacts on both the camera body and the lens. Ensure you are using the correct focus mode for your subject. Make sure there is enough light and contrast in your scene for the autofocus system to detect edges.
What does error code 0xA00F4244 mean?
This Windows error means the system cannot detect your camera. Check that the camera is enabled in Device Manager, update your drivers, and verify that no physical switch is turned off.
Can I clean my camera sensor myself?
Yes, but proceed with caution. Start with a hand blower. If that does not work, use a specialized sensor cleaning kit with swabs and solution. If you are not confident, professional sensor cleaning is affordable and safe.
Why does my flash not work?
Check that the flash is enabled in your camera settings. Test the LED using your phone’s flashlight app. If the LED does not light up, the bulb may need replacement. Also check if the camera is overheating, as this can temporarily disable the flash.
How do I prevent moisture inside my camera?
Allow your camera to acclimate gradually when moving between temperature extremes. Use silica gel packets in your camera bag. If condensation forms, dry the camera naturally in a warm, well-ventilated area without applying direct heat.
When should I replace my camera instead of repairing it?
If the repair cost exceeds 50 percent of the camera’s current value, or if the damage involves the sensor or motherboard on an older model, replacement is often the more economical choice.